
Pieces included in kit, as shown above:
(4) 1"x4" strips in 4 different patterns
(4) 1-1/2" x 4" strips
(1) 3-1/2" x 3-1/2" square
(1) red rectangle
(1) white rectangle
(3) 2-1/2" x 2-1/2" white squares
(12) 3/4" yellow squares
(3) decorative edge white strips
(1) white snowflake
(2) gingerbread men with (8) tiny red strips
(8) green triangles
(2) yellow stars
(8) red candy canes
(1) green wreath
(1) bow for wreath
(4) candy die cuts
(18) small red circles and (18) small green circles
(1) green Merry Christmas die cut
(1) red Create Joy die cut
(Patterns and colors may vary in kits)

Kit supplies cont.:
(4) white squares, scored, numbered 1-4
(4) 4"x6" brown rectangles
(4) 4" x 6" white rectangles,
(4) 5-3/4" x 3-3/4" brown rectangles
(4) red rectangles
(4) green rectangles
(4) brown rectangles
(4) white photo mats each in 4 different sizes

Using square marked #1, fold on score lines and cut out corners (marked with X), see picture below.


Using decorative scissors or edge punch, trim both long sides of each 5-3/4" x 3-3/4" rectangles (see picture below for example of decorative edging). Glue to white 4" x 6" rectangles.


On smaller red rectangle, cut out rounded top on pencil lines. Glue to white rectangle. Using decorative scissors cut out on white rectangle around door shape, see picture below for example. Glue wreath and bow to door.

Glue 1" x 4" patterned strips to bottoms of 4" x 6" brown rectangles.

Glue rectangles to tabs on square #1.

Glue 1-1/2" x 4" strips on top of white tabs.

Fold on score lines and cut out corners on square #2.
Glue red rectangles to white strips.
Glue patterned strips on top of white flaps. (All strips are cut at 4" so you have the option to pick the patterns for each layer, so you will need to trim off excess to fit)

I was on a roll when I was scoring and realized I scored at the wrong measurement on square #3... after I was done with all of them! So instead of being wasteful and throwing them out I re-scored and marked the wrong line with little x's, since it will not show on the finished project. So... on square #3, do not fold on the lines marked with the little x's, score on lines next to it. Then cut off the corners, same as you did with the previous squares.

Glue green rectangles to white flaps on square #3.
Glue 1" patterned strips on top of white flaps, cutting off excess.

Square #4 - fold on score lines and cut off corners.
Glue brown rectangles to white flaps.
Glue 1" patterned strips on top of white flaps, trimming off excess.
Glue 3-1/2" x 3-1/2" square of patterned paper to middle of square, as shown in picture above.

Time to glue layers together... put adhesive on bottom of square #2 (not on the flaps) and adhere to top of square #1. Continue with each layer, it will look like above picture (minus the tree).

Now it is time to start decorating your layers. You should have 4 white photo mats for each layer, in 4 different sizes, large to small.
Using decorative scissors or edge punch trim around largest white photo mats, if desired. Attach photo mats and die cuts as shown above.

Second layer. Using decorative scissors or edge punch, trim around edges of photo mats, attach to flaps. Decorate with die cuts.

Third layer. Using decorative scissors or edge punch trim around photo mats, glue to flaps. Glue on die cuts.

Fourth layer. Using decorative scissors or edge punch trim around photo mats and attach to flaps. Decorate with buttons and die cut.

To assemble tree fold all pieces in half on score lines.

Glue triangle sides together, as shown above.

Continue to glue sides of trees together, until all pieces are glued together.

Glue two loose ends together to create tree.

Put glue on bottom edge of tree and place in middle of top layer, as shown above. Set aside to dry.

Glue one peak of star together, as shown above.

Put glue on top of tree and sandwich star on top. Decorate tree with jewels.

Roof pieces included in kit:
(1) white square, scored
(1) large white rectangle, scored
(2) roof side pieces
(2) brown strips

Fold square on score lines, cut slits on score lines and up to score lines on each side. (See dark lines in picture above.)

Fold tabs to inside and glue. Hold with clips or paperclips while drying.

Score roof sections on score lines, see above.

Wrap roof pieces around white box, hold with clips while drying.
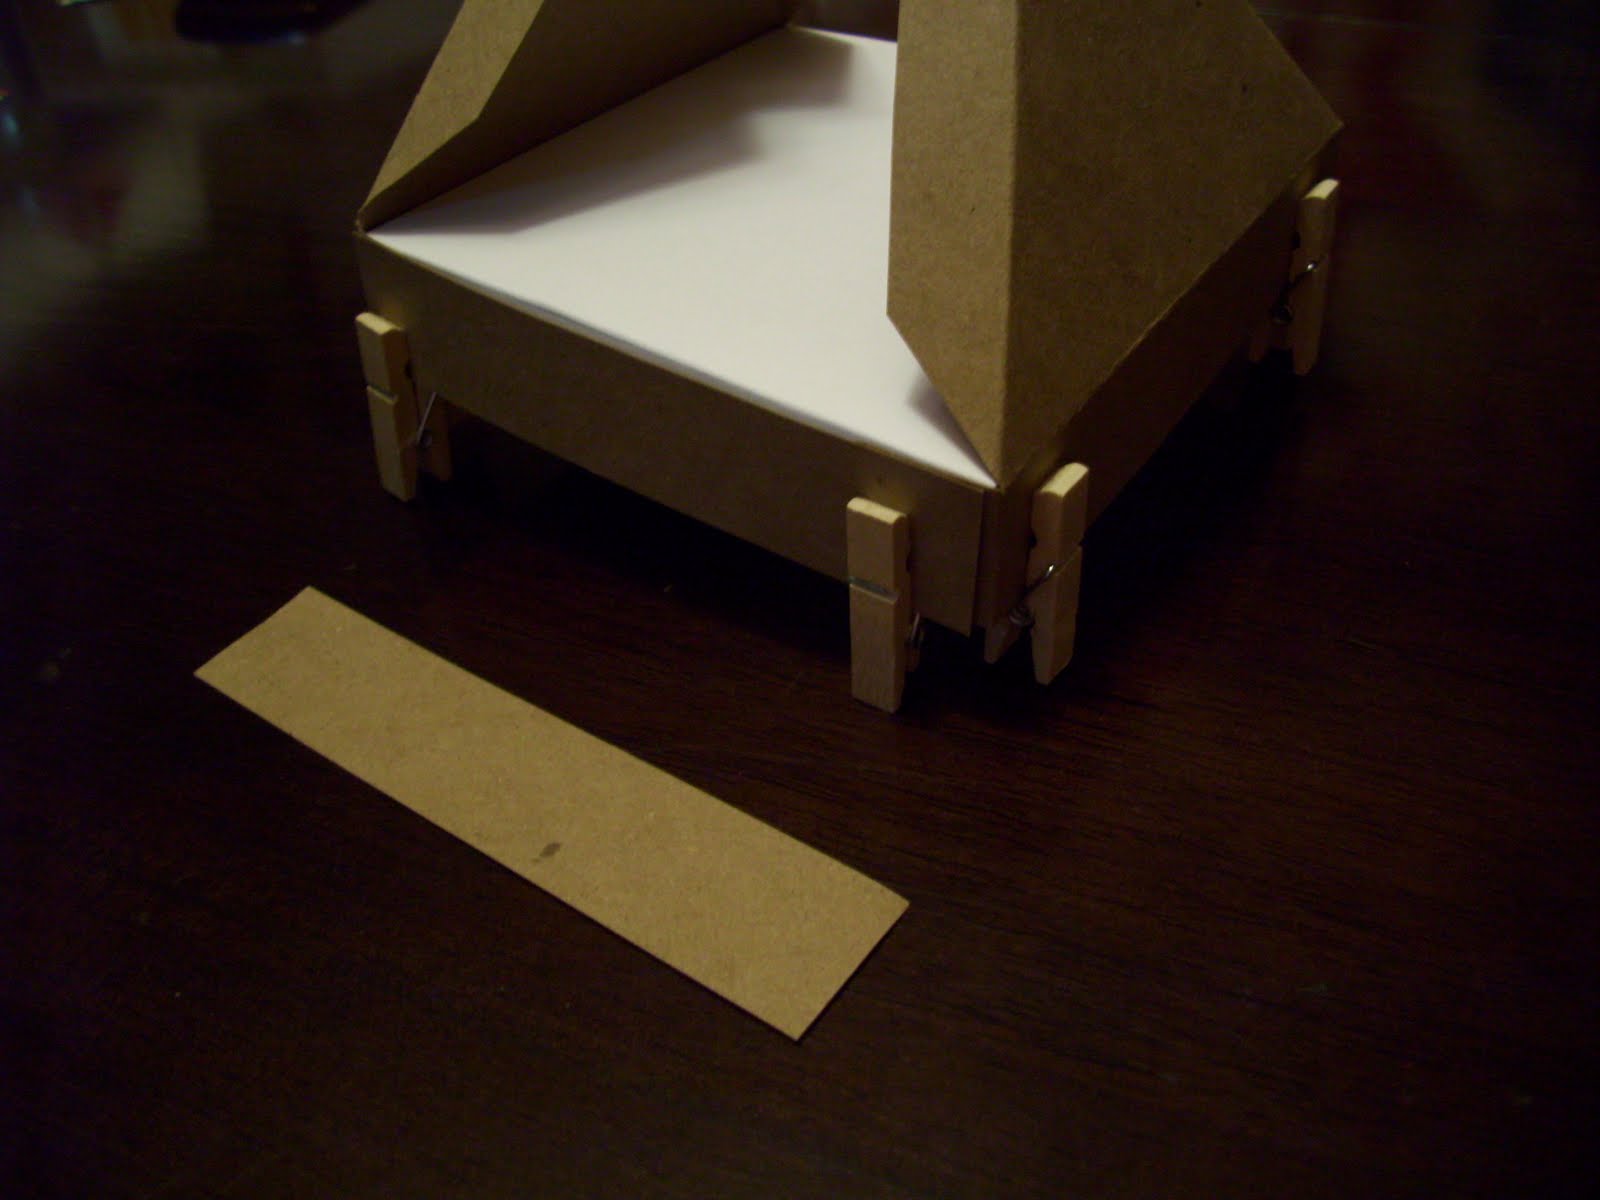
Glue brown strips on sides, covering roof tabs.

Edge punch/cut with shape scissors on all sides of long white piece. (Edges are not done in pictures.) Fold in half, and on score lines.

Cut 3 slits on each side, in middle and on sides, see dark lines above.

Apply glue to brown roof tabs and glue white piece on top, this piece will overlap about 1/4" in the front and back, see pictures.


Decorate roof with candies as shown. Attach snowflake to front side of roof. (Apply glitter to snowflake before attaching, if desired.)

Apply red jewel in middle of snowflake and silver jewel for doorknob. Apply red rhinestones to wreath and green rhinestone to center of bow.

Side view.

Back view.
No comments:
Post a Comment