Thursday, September 30, 2010
Sunday, September 5, 2010
Explosion Box Kit Instructions

Explosion Box Outside View

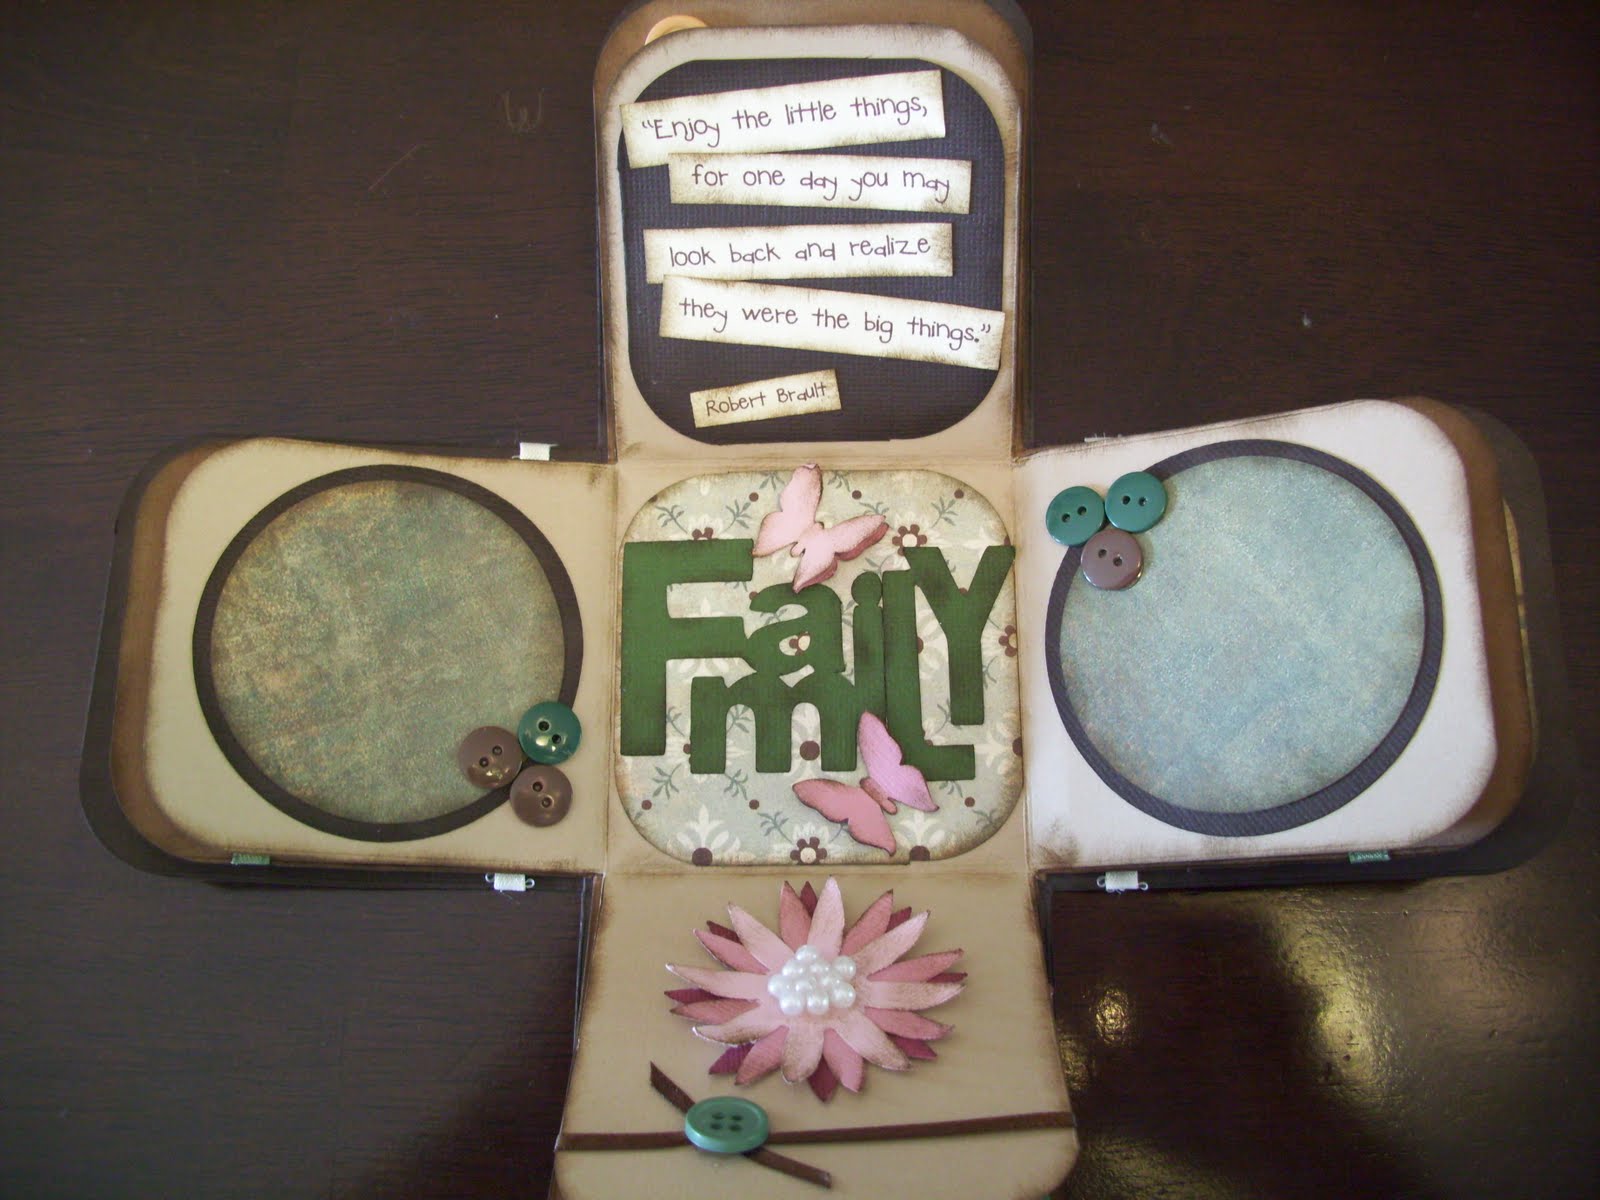
When lid is removed, album "explodes open", revealing a unique mini album with pictures and journaling.

Ink/distress edges of butterfly strips, if desired. Glue to inside/bottom edge of textured side of dark brown layer, as shown above. Bend out wings on attached butterflies.

Fold the tabbed pieces on score lines. Ink/distress all edges, if desired. Layer and glue together the three pieces, dark brown on bottom, then medium brown, tan on top, applying adhesive as described below:
Apply glue/adhesive to middle square only of dark brown piece (untextured side - textured side with butterfly strips should be facing down), center and stick medium brown piece on top of dark brown. Apply glue/adhesive to middle square only of medium brown square, center and stick tan piece on top of medium brown. This will be the box bottom.

Layout the pieces shown above: "Family" die cut; 1 light pink, 2 med pink and 1 dk pink butterfly; 1 lt pink, 1 med pink and 1 dk pink flower; 2 cardstock circles and 2 pattern paper circles; 1 cardstock square mat and 1 pattern paper square mat; asst. buttons; thin brown ribbon; printed saying. Ink/distress edges of all pieces, if desired.
Hand cut printed saying into sentence strips, see picture below. Ink/distress edges of all pieces, if desired.
Assemble first layer (tan) as shown above. Embellish flower middle with pearls, glitter glue, buttons, etc.

Layout pieces shown above: 4 square picture mats in 2 different prints; 2 green ribbons, asst. buttons. Ink/distress edges of mats, if desired.

Assemble second layer (medium brown) as shown above.

Layout pieces shown above: 2 cardstock square mats; 2 pattern paper square mats, 2 pattern paper strips; 2 cream ribbons; 4 flowers ea of lt pink, med pink and dk pink; saying mat. Ink/distress edges of pieces, if desired.

Assemble bottom layer (dark brown) as shown above.


Close-up of bottom tab on bottom layer.

Layout lid pieces shown above. Cream lid; brown polka dot ribbon; 6 dk pink flowers, 3 ea med pink and lt pink flowers; 2 green butterflies. Ink/distress all edges, if desired.

Fold lid on score lines. Ink/distress all edges, if desired.

Glue flaps to inside of box lid, as shown above with paperclips.

If using liquid glue, use paperclips to hold flaps until glue dries. Trim off any excess flap pieces.

Wrap ribbon around box, using glue dots or adhesive of choice to adhere to box. Tie in front.

Assemble flowers as shown and attach to lid top. (layer 2 dark pink, 1 med pink and 1 light pink) Attach butterflies on flowers. Embellish flower middles with pearls, glitter glue, buttons, etc. Fold up all 4 sides of box bottom and hold up to fit lid on.
Family Display Album Kit Instructions

Front view of Family Display Album

Inside view of album

Stand album up to display on shelf or table
KIT INSTRUCTIONS:

Glue paper to chipboard pieces; printed paper on one side, brown paper on the other side.
Ink/distress all edges, if desired.

Fold all 4 brown paper strips on score lines. 2 shorter pieces will be joined together.

Glue 2 short brown strips together as shown above with paperclips, gluing one flap on top of the other. Ink/distress all edges, if desired.

Glue top & bottom strips to chipboard pieces, as shown above, matching inside edges and top/bottom edges. (chipboard is shown uncovered in pictures for better contrast)

Close up view of paper placement

Glue middle brown strip on chipboard pieces, matching outer edges, as shown above.

Close up view of paper placement

Lay out pieces as shown above. You should have 8 solid cardstock mats, 2 each of 2 different printed papers, 2 strips of printed paper, 2 mats with sayings, 2 blue & 2 brown scallop circles, and 1 small brad. Ink/distress all edges of each piece, if desired.

Assemble pieces on brown strips as shown above, alternating solid cardstock mats and printed paper mats on top and bottom strips.

To make flowers make small slits down from each scallop indention, as shown above.

View of blue flower slits. Put brad through both flowers. Glue flowers to album with glue dot or adhesive of choice.

Glue blue "family" on top of brown "family" pieces, ink/distress letters, and attach to front of album, as shown above. Assemble another flower and attach to front of album.

Attach ribbon to back of album with glue dots or adhesive of choice, as shown above. This is the only place that ribbon will be attached.

Wrap ribbon around front of album and tie bow.
Subscribe to:
Posts (Atom)